Installing a Well Water Filtration System: A Step-by-Step Guide
Installing a well water filtration system is one of the best investments you can make in your home’s health and comfort. Whether you’re dealing with sediment, iron stains, sulfur odors, hard water, or microbial contamination, the right filtration system improves water quality, protects appliances, and gives you peace of mind. This guide walks you through the process—from assessing your water to maintenance—so you can make informed choices and know when to call a professional.
Why Filter Well Water?
Protect your health and home
Unlike municipal water, well water comes directly from the ground and can carry minerals, bacteria, or contaminants depending on local geology and land use. Filtering removes harmful or nuisance substances that affect taste, appearance, plumbing, and laundry.
Extend appliance life
Hard water and iron build-up can shorten the lifespan of water heaters, dishwashers, and washing machines. A properly selected filtration system reduces scale and corrosion.
Step 1: Test and Assess Your Water
Get a professional lab test
Start with a comprehensive water test from a certified lab. Typical tests measure pH, hardness, iron, manganese, nitrate, coliform bacteria, and total dissolved solids (TDS). Accurate results reveal which contaminants need treatment and whether you require disinfection, softening, or specific media filtration.
Inspect your well and plumbing
Evaluate well depth, pump type, pressure tank, and existing plumbing. Note any visible issues like rust, discoloration, or odors. These factors influence system design and placement.
Step 2: Choose the Right Filtration System
Match technology to contaminants
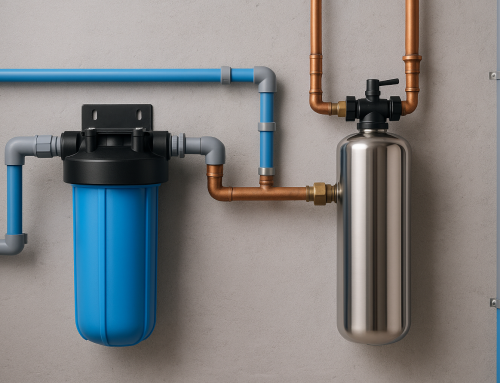
- Sediment filters: Remove sand, silt, and particulates.
- Iron filters: Oxidizing media or air-injection systems handle dissolved iron and manganese.
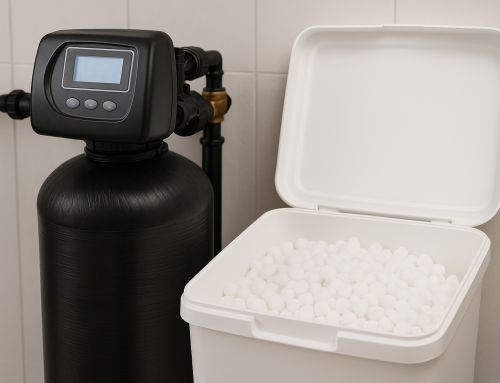
- Water softeners: Ion exchange reduces hardness (calcium and magnesium).
- Activated carbon: Improves taste and removes organic contaminants and chlorine (if present).
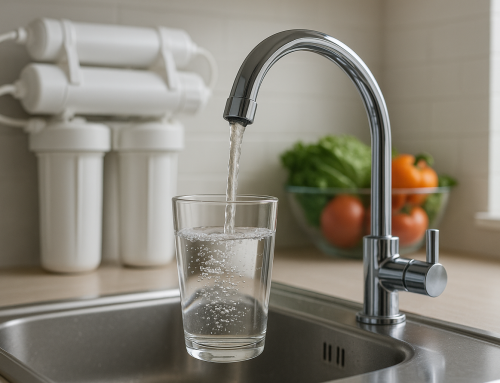
- Reverse osmosis (RO): Produces very high-quality drinking water; typically used as a point-of-use system under a sink.
- UV disinfection: Kills bacteria and viruses—essential when coliform bacteria are present.
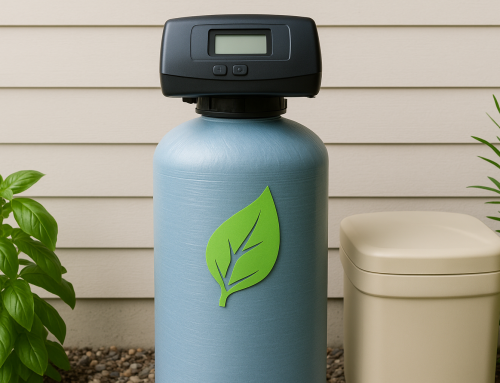
Whole-house vs point-of-use
Decide whether you need whole-home treatment (protects all plumbing and appliances) or point-of-use systems (RO for drinking water, for instance). Many homes combine solutions for best results.
Step 3: Plan the Installation
Location and layout
Place whole-house systems near the pressure tank or where the well line enters the house, ensuring easy access for maintenance. Consider space for bypass valves, drain lines, and electrical power if needed.
Permits and regulations
Check local codes and well regulations. Some jurisdictions require permits for plumbing changes or electrical work. Professional installers will handle these details.
Step 4: Installation Basics
Tools and materials
Common items include pipe cutters, fittings, mounting hardware, Teflon tape, pressure gauges, and drain lines. Specific media tanks, control valves, and UV chambers will be supplied with your chosen system.
General installation steps
- Shut off the well pump and relieve system pressure.
- Cut the main water line at the chosen location and install a bypass loop so water can be routed around the system during service.
- Mount filter tanks and connect piping, following manufacturer instructions for inlet/outlet orientation.
- Install pre-filters (sediment) ahead of specialized media (iron, softeners, carbon).
- Set up drain lines for backwashing systems and ensure proper air gap or indirect discharge per code.
- If using UV, install after all filtration and before any storage tank; connect electrical power according to local codes.
- Slowly bring the system online, check for leaks, and adjust control settings per test results.
When to hire a pro
If you’re uncomfortable with plumbing, electrical work, or permit processes, hire a licensed installer. A professional ensures correct sizing, safe connections, and long-term reliability.
Maintenance and Testing
Routine care
Change sediment and carbon cartridges regularly, replenish softener salt, and clean control valves per the manufacturer schedule. Backwashing filters require periodic checks for correct cycles.
Periodic testing
Re-test your water annually or whenever there’s a change in taste, odor, or appearance. Confirm UV lamps and RO membranes are functioning and replace them as recommended.
Costs and Timeline
Budget considerations
Costs vary widely by system type and home size. Sediment and carbon filters are relatively inexpensive; iron removal, whole-house softeners, and UV or RO systems are pricier. Factor in installation labor, materials, and ongoing maintenance.
Typical timeline
From testing to a fully operational system, expect anywhere from a few days (simple installs) to a couple of weeks (complex or permit-required jobs).
Conclusion
Installing the right well water filtration system protects your family, your appliances, and your peace of mind. Start with a professional water test, select technologies that address your specific contaminants, and plan your installation carefully. If you’d rather leave the technical details to experts, reach out to Custom Filtration Systems to schedule an appointment for personalized recommendations and professional installation.